

View attachment 126447View attachment 126448
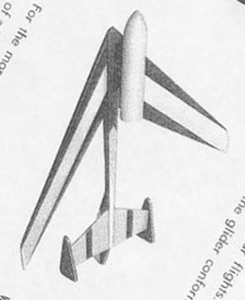
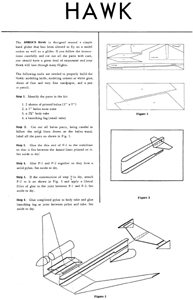
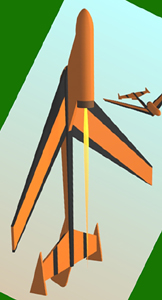
Well here is the newest rocket in my fleet, and the first (complete) boost glider. I also have a nanite from fliskits, but it is still in the bag. It was an interesting build, and I know what the instructions say about not painting, but I firmly believe that rules are put into place only for the purpose of breaking them. I did, however, only use a light coating of fluorescent yellow, with no primer underneath. The stripes were brush painted testor's enamel. Construction was straightforward and even quite simple, although I did complexify it by adding rounded edges and airfoils on the wing surfaces. I further complicated it with wood filler smoothing all the joints. I think the weight trades off with the added aerodynamics. At least that is what I tell myself. I did paint it before trimming for flight, as I figured the weight may change after paint. I found it to be a little nose heavy, so I went ahead and glued the nose cone on, and found the smallest push pin my wife had in her sewing kit. The pin went into the tail and left me a place to add a ball of clay. I did find the rocket to be quite delicate, as I nicked the leading edges of the wings just by crashing into some weeds in the grass, but that is what happens when you sand down an already thin piece of already soft balsa. I also had paint bleed through under the masking areas, as I did not want to burnish the masking tape down onto the wings for the same reason. You can't see it from the launch pad, though. Two things surprised me though. One was when I got it trimmed just right, it flew unbelievably well. So well, in fact, that it overshot where I thought it would go and bounced off the side of my shed leading to the second surprise. What a wimpy rocket! The tail broke completely off. I already read the above post on how Chris fixed his with a toothpick, and within minutes was back in business. However, that made the plane tail heavy, and I had to move the pin and clay to the nose. Since I had already glued the cone on, I had to fashion a new tip on the outside of the cone. After a coating of white glue, and a quick spray of yellow, it is hardly noticeable, again can't see it from the pad.
After seeing a few gliders in flight, I realized that Murphy's law cannot be broken and inevitably leads to the glider gliding directly opposite the path you would want, for purposes of recovery, so I wanted to have this one circle gently. This was achieved by gluing the tail rudder ever so slightly to one side. It is so slight that the root edge is still solidly attached along it's entire length, just a tiny bit off. Makes the glider hit the ground in glide tests at about a 45 degree angle from the toss at about 50 feet out. Should be a nice large circle, but hopefully will still boost straight. While I did intend for this effect, and was thinking hard about how to achieve it, I must admit that I did not glue the rudder on crooked on purpose; rather I just got lucky (?). We'll see when launched if it actually is lucky, or a fundamental blunder. One last mod is the hole in the side for ejection gasses. It is ready to go, now 3 weeks left for the next launch.
Post copied to gallery with permission
Attachments


Last edited by a moderator:


![0709232038a[1].jpg](https://cdn.imagearchive.com/rocketryforum/data/attachments/508/508176-fbacbab46786e1a2f4c937651e950418.jpg "0709232038a[1].jpg")