North Coast Rocketry Lance Beta Clone

The Rocketry Forum

Help Support The Rocketry Forum:

This site may earn a commission from merchant affiliate links, including eBay, Amazon, and others.

r12ski

Well-Known Member
Joined
Jun 30, 2009
Messages
288
Reaction score
7
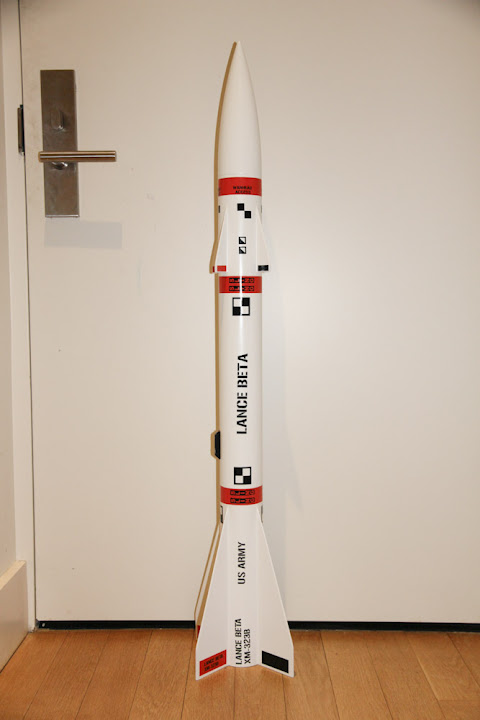
Well there is nothing like losing an ebay auction at the last minute to encourage a new project. Ignoring the pile of unopened kits, I set off to procure the parts needed to clone the Lance Beta.

After a little research and some time going over the RockSim file, I realized this actually is a pretty easy kit to clone. The nosecone is an odd size, made specifically for NCR during the "by Estes" era. Thankfully, Estes reused the nose cone for the Big Daddy. The body tube is 3" OD tube (not LOC 3.1") but Apogee sells 3" tube that works perfectly.

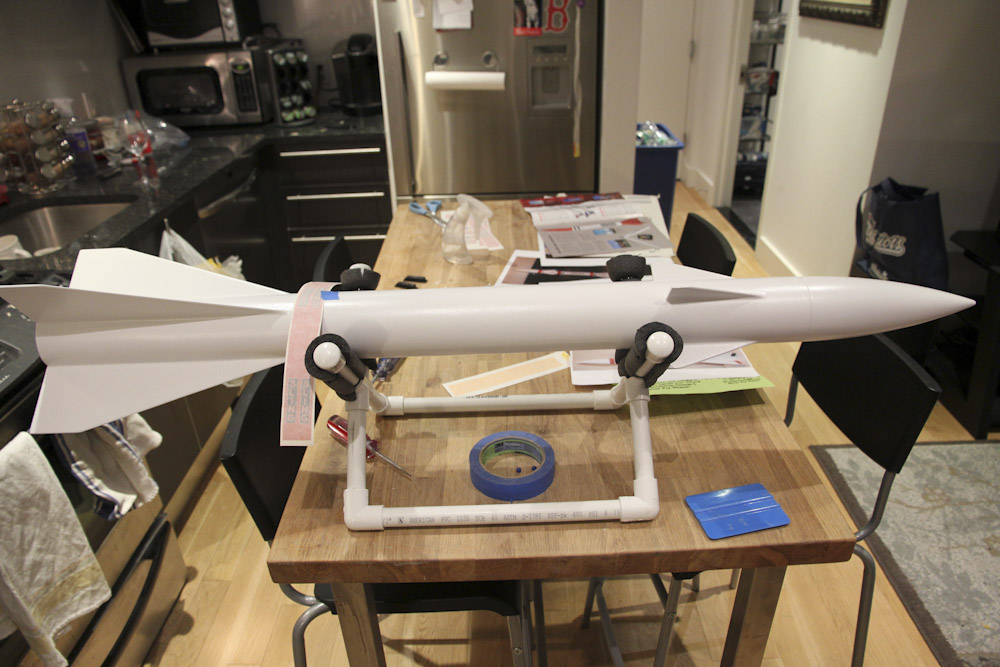
Of course I won't be using the original 28.5" MT or plastic centering rings. I'm using LOC 29mm tube and 3" to 29mm centering rings. I should mention I live in a small apartment in Brooklyn and unfortunately don't have room for fun things like table saws and drill presses to make my own rings or fins. I'm using an AeroPack 29mm retainer ring for retention. In the second pic you can see my test fitting the internal parts. The LOC rings will have to be sanded down a bit to fit into the body tube.

Balsa Machining took care of both sets of fins for me and did an excellent job.

IMG_2157.jpg

IMG_2158.jpg
 
I modified the RockSim file to accommodate for the changes in parts. I can't tell if the original rocket had TTW fins as the Rocksim didn't show them, so I changed that also. I shifted the end of the motor mount tube slightly forward so that the AeroPack retainer won't stick out past the end of the body tube.

The first step is to cut the body tube to size. It comes in 18" sections so I needed two sections with the second piece trimmed to 16" for a total of 34" length. I used a third section about 6" long to make a tube coupler. I also cut a section of 29mm tubing 14" to fill as much of the lower section as possible while allowing clearance for the coupler.

I used the videos from Apogee's website on cutting body tubes and making your own tube couplers. They were extremely helpful. I'm now watching the one on cutting TTW fin slots which will be my next step.
 
Yes, the Estes NCR Lance Beta had through the wall fins on the aft end. They actually locked into the centering rings. It was a pretty net set up except the motor mount tube was on the small side and would just barley hold an Aerotech RMS case. The only other draw back was the motor retainer had to have the ID enlarged to accept the thrust ring on the RMS case.
 
I'm anxious to see your finished product. The Lance Beta is one of those that I wish I'd bought pre-Estes.
 
I should mention that Tango Papa has decals for this kit. Mine are in the mail so I haven't seen them yet but I'm sure they're top notch.

If everything works out, I'm considering doing an upscale. If I use the LOC 5.54 tube that works out to about 1.85x upscale. I'm planning on adding this to EMRR and will include the Rocksim file, but if you need it I can post it here.

Like you, I have an affinity for NCR kits but I only knew them when they were owned by Estes. The kits were available when I was in high school and didn't have the scratch to buy them myself. I got the Phantom 4K starter set and the Patriot as gifts. By the time I was working and could buy the kits myself NCR was long gone. My uncle has a Lance Beta (sans nose cone), a Big Brute, an Eliminator, and an incomplete Interceptor G.

A few years ago, I was able to get a NCR X-Wing and finally started putting it together about a month ago. Its almost complete – just have to fill the body then prime and paint. I plan on posting that too.
 
Unfortunately, my BAR experience didn't begin until after Estes had dumped the North Coast line for a few years. I never got to try either the original models or the Estes versions. There are a few I'd love to try - Black Hole Betty is one of them. I'd heard that Matt Steele had reclaimed his original designs back from Estes (which did not include either the X-Wing or the Interceptor G) and was either going to start producing rockets again or license them to someone to produce. I haven't heard anything more in a long while, so I'm guessing that the whole thing is now a bust.
 
I flew my NCRBE Lance Beta at NARAM-52 this past August with an F62-6 DarkStar motor. Excellent flight! :D

N52 NCRBE Lance Beta.jpg

N52 NCRBE Lance Beta ignition of F62-6 DarkStar motor.jpg

N52 NCRBE Lance Beta climbing  on  F62-6 DarkStar motor.jpg
 
Bob - that one looks great :)

Might have to add this clone to the que, as I have a crashed Big Daddy with a good cone ( and still have a few 3" od tubes I got from Chris years ago ;) )

will be following the clone build, more pics please.

~ AL
 
I flew my NCRBE Lance Beta at NARAM-52 this past August with an F62-6 DarkStar motor. Excellent flight! :D

Wow thats a nice flight. And it just so happens I have one F62-6 left myself! Looks like the perfect first flight.

The clone is starting to take shape. Apogee's videos were a big help. I should give credit where credit is do and link to those videos:
Cutting Body Tubes
Making Your Own Couplers
Cutting Slots For TTW Fins

These videos made things easy. The only problem I had was I didn't have a large enough aluminum angle to make marking and cutting the body tubes as easy as on the video. I am definitely picking up some wider ones the next time I'm at the Depot.

Here is the lower BT marked and slotted:

IMG_2159.jpg

IMG_2160.jpg
 
The next thing I had to do was grind down the centering rings then assemble the motor tube and prepare the fins. I used a Dremel to sand down the fins and while it made quick work of the job, it was hard keep things equal – the Dremel seemed to catch in some places making the outer edge uneven.

I only glued the middle and upper centering rings to the motor tube. This way I can add internal fillets before I glue on the lower centering ring. Once the motor tube was dry, I proceeded to glue it in place inside the body tube.

Next, I prepared both sets of fins for mounting. They fins are plywood on the bottom and basswood on the top so there isn't much to fill, plus I plan to add a thin coat of epoxy across all fin surfaces when I make the outer fillets.

The only problems I had during this stage were that the upper centering ring was not completely dry when I glued the motor mount into the body tube (it looked dry) so it twisted slightly when gluing it in. Second, I used a razor plane to bevel the leading edge on both sets of fins. Obviously, with plywood fins the results are a bit rough. Nothing a little Elmers Fill 'N Finish couldn't handle.

IMG_2161.jpg

IMG_2165.jpg
 
Bob - that one looks great :)

Might have to add this clone to the que, as I have a crashed Big Daddy with a good cone ( and still have a few 3" od tubes I got from Chris years ago ;) )

will be following the clone build, more pics please.

~ AL

Thanks for the compliment. :D

It's actually my SECOND Lance Beta. My original one was lost on it's first flight at NARAM-41. It was caught up in a tree. :mad:
 
After using some filler on the beveled edges of the fins and some final sanding it was time to glue the main fins on. I used wood glue on all the surfaces followed by internal fillets also with wood glue. Later on I plan to use West Systems epoxy on the external fillets and extending a thin coat to the tips. While it may be overkill on the bottom fins, I want to make sure the canard fins are as strong as possible seeing as they are not TTW.

_MG_2176.jpg

_MG_2177.jpg

_MG_2178.jpg
 
I'm doing more building than updatng, but that's a good thing, right?
Also, the decals from Tango Papa arrived today. :w:

After the internal fillets dried overnight I was able to install the lower centering ring. For some reason the LOC CR's were very thick (nearly 3/8") and I hadn't anticipated that thickness in modified rocksim when I had ordered the fins from BMS.

As long as the centering rings meet at the point where the TTW portion of the fin comes in, this is no big deal and I adjusted my measurements accordingly.

The only issue that this created was on the lowest CR because I needed to leave enough room for the Aeropack retainer to be glued to the MT. I also wanted the end of the retainer to be flush with the end of the tube so that I could stand the rocket up on end.

I calculated everything correctly but, because the ring was so thick, I only had about 1/8" left of motor tube to glue on the ring. Time for the Dremel. I carved a valley on the rear side of the centering ring that would give the retainer a little more MT to adhere to.

It worked perfectly and I glued the lower ring in place with wood glue followed by the AeroPack using JB Weld.

_MG_2187.jpg

_MG_2190.jpg

_MG_2194.jpg

_MG_2195.jpg
 
With the lower section of the rocket completed, it was time to assemble the upper section.

At this point, you could decide to have the rocket separate in the middle or at the top. I'm thinking of making an upscaled version later on, so I doubt I would ever fly this with any electronics on board. Also, I would worry that the canard fins would be more susceptible to getting knocked off if the rocket came down in two halves so I'm sticking with the original layout.

I first glued the homemade coupler into the lower BT and allowed it to dry before the upper section was glued on. When I originally marked up the lower BT for fin placement I had dry fit the coupler and extended the lines to the upper BT so that I would be using the same marks for both sets of fins. I also poked holes along the BT where the canard fins attach to form "rivets" for added strength. My first time using this technique and it's pretty neat. You can actually feel the little bumps on the inside of the BT.

Then I carefully attached the canard fins. I used wood glue here too, coating the fin with glue, attaching to the rocket, removing, let both surfaces dry, the added a second coat and glued in place.

_MG_2200.jpg

IMG_2202.jpg

IMG_2208.jpg

_MG_2240.jpg
 
This thread is not dead yet! I swear!

Sorry for the delay but I moved. Twice. So it has been a while since I've been able to get any work done on rockets. The good news is that my new apartment building has a workshop where I can make a mess :D

As far as the LB build goes, I've finished the epoxy fillets and coated the fins with a thin layer of epoxy for extra strength. I now just have sanding and painting left.

The good news is that in my absence Stickershock has come out with vinyl decals for the Lance Beta which is a huge deal because I was planning on recreating the decals in Adobe Illustrator then printing them myself. I don't think they would have come out as nice, especially on the big blocks/stripes of black and orange.
 
I built my NCR LB (Estes era) using all plywood rings and LOC motor tube back in '99, I think. I built the whole thing, fillets and all, with Titebond yellow glue. I flew it last weekend on a F52T. I tend to build heavy, and it came out to 28oz. My NCR SA-14 Archer weighs a hefty 52oz. And my NCR Patriot weighs 48oz. I never built the Bomarc or the X-Wing fighter. They're tucked safely away with the pre Estes Phantom 4000 and 4000HD :cool:. I never got the Interceptor G, Eliminator, or Big Brute :(. But I love flying the ones I built. The Archer is great on a H97J and the Patriot is great on the G75J. The Archer was my level 1 rocket also. Great to see your clone coming along so well. It's been a good flyer for me.
 
Finally finished. I had trouble getting the finish I wanted. I was using Kilz. It fills in gaps quickly but leaves tiny air bubbles that are easy to miss when sanding. You don't notice them until you put a coat of paint on then you have to go back to sanding.

Also, for some reason the coupler has enough play to crack the finish. Having all that nose weight puts a lot of stress on that joint if the rocket is being handled or gets knocked over.

I used the vinyl decals from Stickershock. I'm not sure if I am going to keep them. First, I didn't do the best job keeping them straight. When you are looking at a sea of white, there is nothing to really orient yourself with. I almost wish I had one of those carpenter's chalk lines to snap in the middle so I could line everything up. But the main reason I'm not liking the decals is the scale is way off. Obviously they needed to be printed larger in vinyl but it is also the way the text lines up on the orange bands. If you start it with the text centered, everything is off center by the time you go all the way around. Everything seems way to big. The design becomes too busy.

If I choose to redo the decals I think I'll go with a combination of Monokote and waterslide decals.

Before I do anything, I plan on seeing how this thing flies!

20111029-IMG_5396.jpg


20111031-_MG_5414.jpg
 
One more thing I forgot to mention. The reason I switched from using the Tango Papa decals to the Stickershock ones because TP's colors were off and the larger sections of black were easily scratched. The orange blocks came looking like red. I have a feeling that it is an RGB/CMYK issue as international orange is a pretty easy color to reproduce.

I haven't contacted either vendor about the decals because some of my issues were my own fault and I think that no matter what you will have the problem of the stripes being too big that they are easily scratched on waterslide paper or the text being too small that you can't do the whole thing in vinyl.
 
Finally finished. I had trouble getting the finish I wanted. I was using Kilz. It fills in gaps quickly but leaves tiny air bubbles that are easy to miss when sanding. You don't notice them until you put a coat of paint on then you have to go back to sanding.

Also, for some reason the coupler has enough play to crack the finish. Having all that nose weight puts a lot of stress on that joint if the rocket is being handled or gets knocked over.

I used the vinyl decals from Stickershock. I'm not sure if I am going to keep them. First, I didn't do the best job keeping them straight. When you are looking at a sea of white, there is nothing to really orient yourself with. I almost wish I had one of those carpenter's chalk lines to snap in the middle so I could line everything up. But the main reason I'm not liking the decals is the scale is way off. Obviously they needed to be printed larger in vinyl but it is also the way the text lines up on the orange bands. If you start it with the text centered, everything is off center by the time you go all the way around. Everything seems way to big. The design becomes too busy.

If I choose to redo the decals I think I'll go with a combination of Monokote and waterslide decals.

Before I do anything, I plan on seeing how this thing flies!

20111029-IMG_5396.jpg


20111031-_MG_5414.jpg


May I copy it to the gallery?
 
Finally finished. I had trouble getting the finish I wanted. I was using Kilz. It fills in gaps quickly but leaves tiny air bubbles that are easy to miss when sanding. You don't notice them until you put a coat of paint on then you have to go back to sanding.

Also, for some reason the coupler has enough play to crack the finish. Having all that nose weight puts a lot of stress on that joint if the rocket is being handled or gets knocked over.

How much nose weight did you add? I don't recall adding any to mine. I'll check tomorrow when I get home.
Adrian
 
May I copy it to the gallery?
Thanks for reminding me. I just did.

How much nose weight did you add? I don't recall adding any to mine. I'll check tomorrow when I get home.
Adrian

The original had 5.9 oz of clay added to the nose. I used the same amount in plastic BBs then added Gorilla Glue to hold them in place, so my rocket comes in a bit over-stable. Plus I calculated everything before I finished painting. The total weight ended up being 30.4 oz with the CG at 22 1/8".

With that weight it will still be over 5:1 T2W on an F52T but theoretically would be stable with an I200 (if I never wanted to see it again). I'm thinking it will fly nicely on G64s and H97s. RockSim puts it at 628' on the F52, 1618' on a G64, 1857 on an H97, and well over 3000' on an I200 (In case you were curious).
 
Yep,

You're right. Mine does have nose weight. It's been a long time since I built it.
Adrian

PS, An upscale would be cool :):)
 
Back
Top